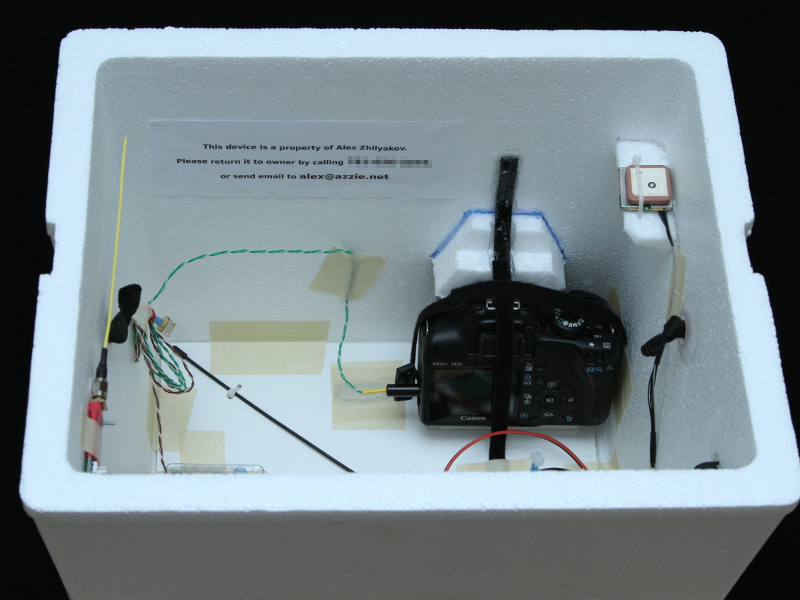
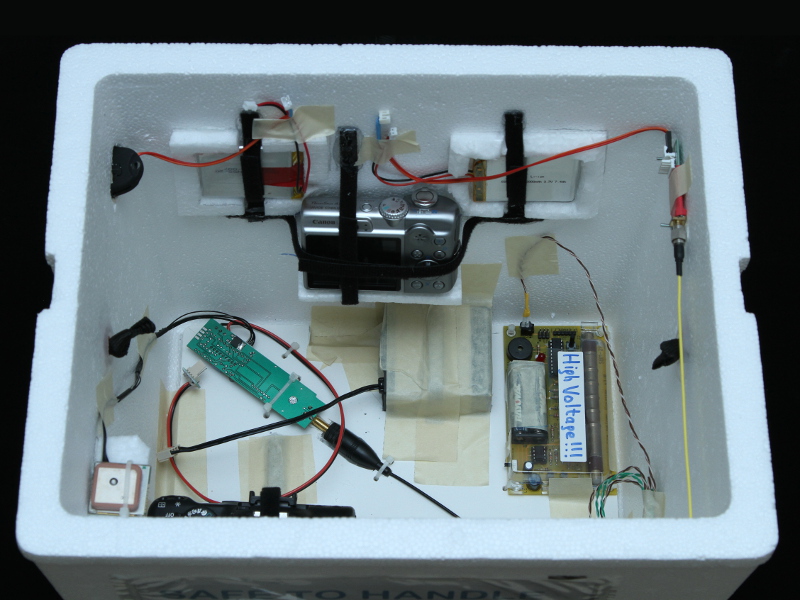
All the cameras, sensors, radio trackers, and a bunch of batteries nicely fit in a styrofoam cooler from Home Depot. The cooler box was lightweight, large enough to accommodate the electronics, and at the same time strong enough to take abuse of space travel or rough landing.
All the equipment was held in place by Velcro strips, which were hot-glued to the cooler’s walls. I tried distributing the weight evenly so that the payload would fly level and not tilt to one side.

High Altitude Balloon payload
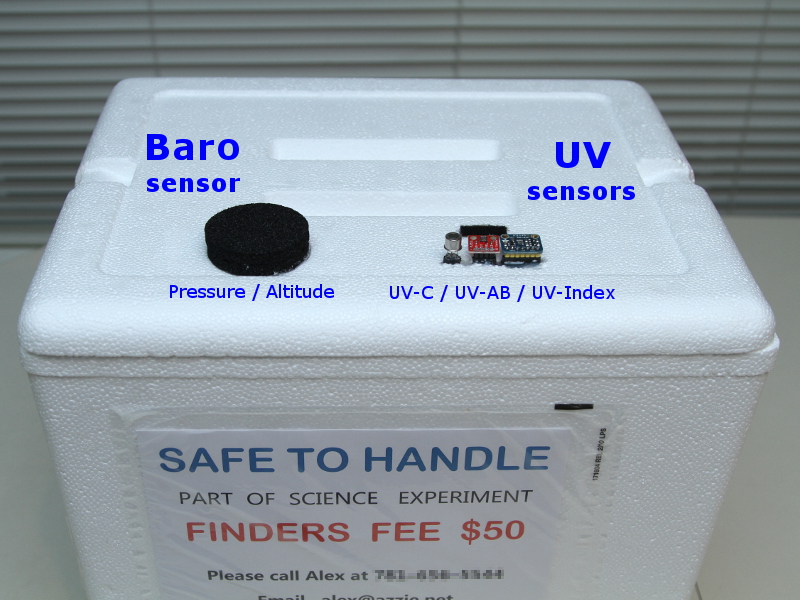
Three light sensors were mounted on cooler’s lid. Barometric sensor was mounted outside on cooler’s lid as well; since it was light sensitive, it sat under black foam cap with a few holes. The cap would block the sunlight, while holes would let the air in and out for accurate pressure measurements.
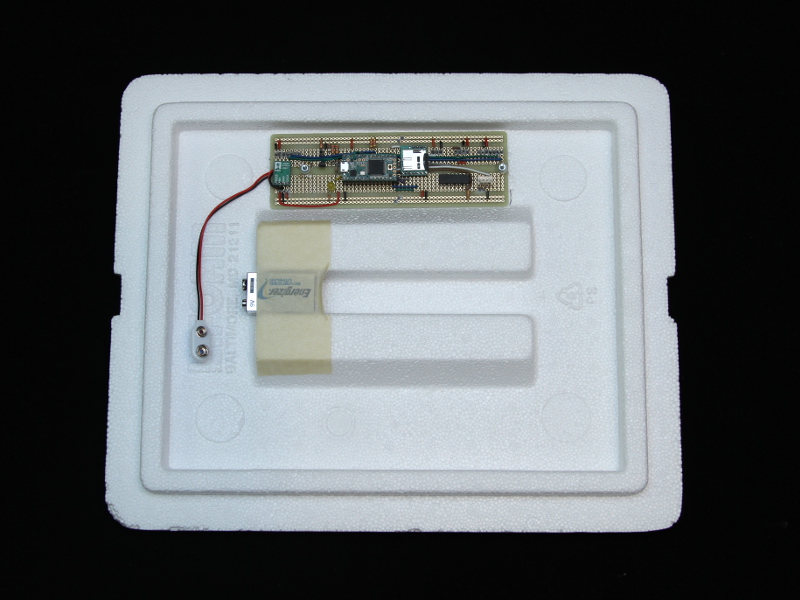
Sensor board and 9V battery were mounted right beneath the sensors on the opposite side of the lid:
The weight of HAB-2 payload was a few ounces shy of 4 lb. I did not want to cross 4lb limit to stay exempt from FAA regulations. To lift heavier payload, I purchased 1200g Kaymont weather balloon from High Altitude Sciences. Plugging payload weight and balloon into HABHUB Burst Calculator yielded the following:
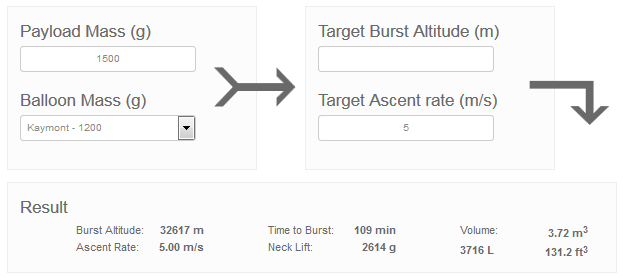
HAB2 Burst Calculator
Faced with the need for ~131 cubic feet of helium, we upgraded our 122 cu.ft. “S” tank to 244 cu.ft. “K” tank, which cost us $140.
To safely bring the palyload down to Earth, I got 5′ Rocketman chute. According to the table on Rocketman’s web site, 5′ chute would slow down 4lb payload to 15 ft/sec.
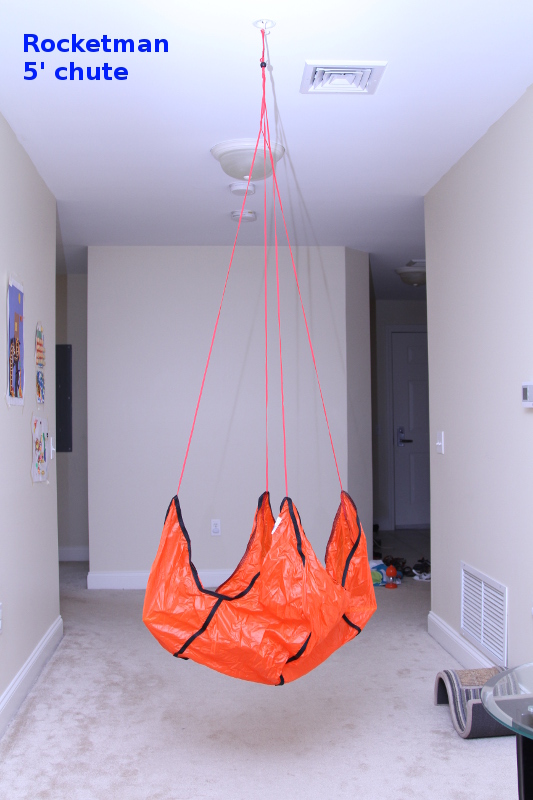
Rocketman parachute
This chute has only 4 lines (fewer lines – less chances to tangle them). Lines go over the canopy and form a loop at the top of the parachute for attaching the balloon.
To tie everything together, I cut 15-feet pieces of Dacron line and tied double bowline knots on the ends. Using quick-links, I connected the payload to the parachute, and top loop on the parachute to the balloon.